by David Terao
The total lunar eclipse of January 20, 2019, was also called the Super Blood Wolf Moon.  Although the name might sound scary, it only refers to the when the full moon (1) is closest to the Earth (“Super”), (2) turns a reddish color during a total lunar eclipse (“Blood”), and (3) occurs in the month of January (a “Wolf Moon”). Unlike a solar eclipse, when the Moon passes between the Earth and sun and casts its small shadow on the Earth that is seen by only a relatively small percentage of Earth’s population, a lunar eclipse can be seen by everyone on the night-side of Earth. A total lunar eclipse also lasts much longer than a total solar eclipse with some lunar totalities lasting over 3 hours. The totality of this January’s lunar eclipse lasted about an hour whereas the totality of the 2017 solar eclipse lasted only about 2 minutes. Although a lunar eclipse occurs relatively often (sometimes 2-4 times a year), it will be visible to different hemispheres of the Earth. The next total lunar eclipse that can be seen in North America will occur on May 26, 2021.
Fortunately, total lunar eclipses are not too difficult to photograph, and you don’t need specialized equipment. However, many photographers, when they first attempt to photograph a lunar eclipse, erroneously believe that photographing a lunar eclipse is similar to photographing the Moon on non-eclipse nights. On non-eclipse nights, you would use an exposure similar to a daylight exposure because the Moon is being lit by direct sunlight. Accordingly, you would use an exposure corresponding to an aperture of f/11 or f/16 and a shutter speed equal to the inverse of the ISO (e.g., If you are using an ISO of 200, your shutter speed would be 1/200 second). Although using this rule would give you a decent exposure of the Moon on non-eclipse nights, it would grossly underexpose the Moon during a total lunar eclipse. During a total lunar eclipse, the Moon can be as much as 14 f-stops dimmer than on a normal, non-eclipse night. I will discuss what settings to use to photograph the lunar eclipse at totality later, but first let’s talk about photographing the partial eclipse preceding and following the totality.
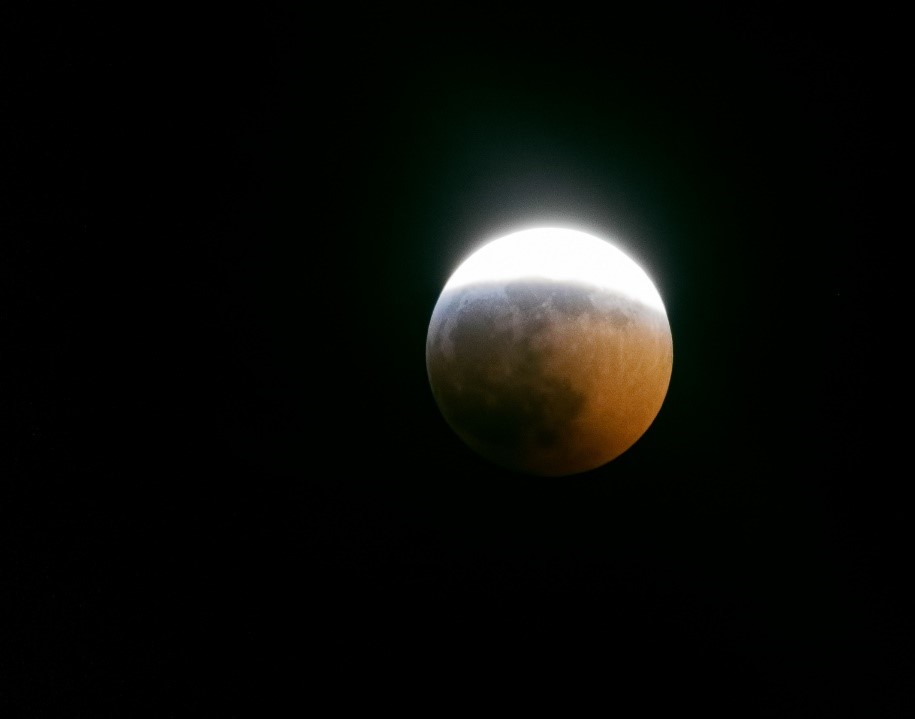
Photographing the Moon during the partial eclipse phases, when the shadow of the Earth covers only part of the Moon, presents a dilemma. Do you expose for the part of the Moon in sunlight or the part of the Moon in the shadow? The answer is, “It depends.” In Figure 1 below, the Moon was exposed for the portion in sunlight. As you can see, the portion of the Moon in the shadow is completely black because of the large dynamic range difference. During a partial eclipse, the portion of the Moon in the shadow area is much darker than the shadow area of the Moon on non-eclipse nights. On non-eclipse nights, one can see details in the shadow area of the Moon quite clearly, even with the naked eye especially during the Moon’s waxing and waning crescent phases. Figure 1 exposure was 1/2500 second at f/8.0 and ISO 6400.
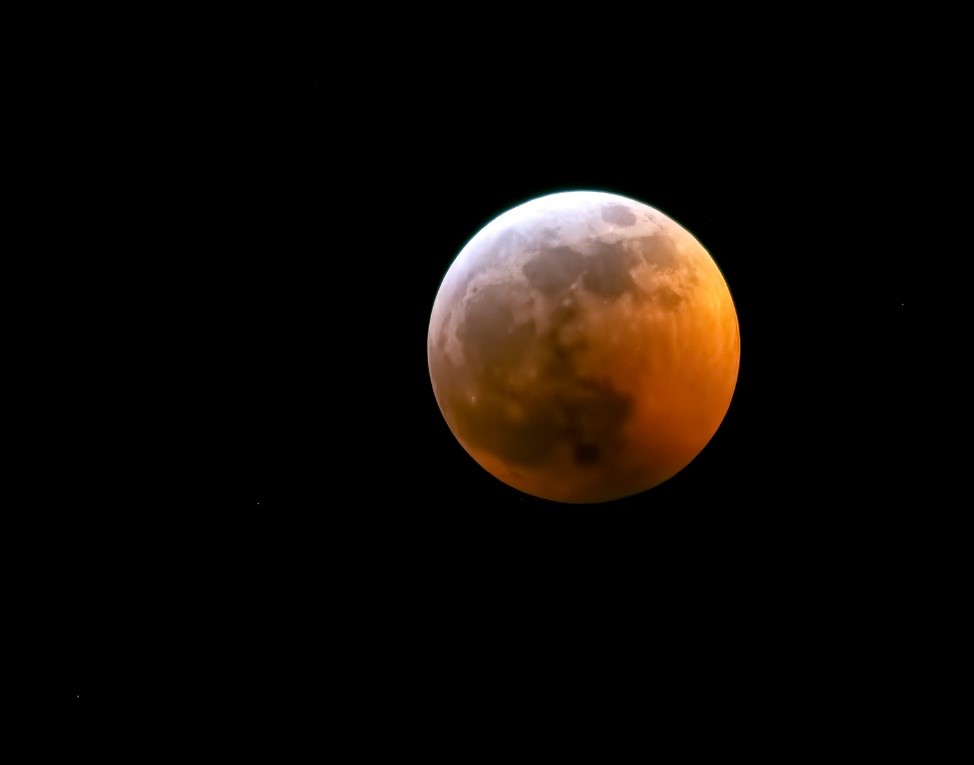
In Figure 2 below, the partial eclipse was exposed for the shadow portion of the Moon. Now, you can see the details in the shadow area, but the portion of the Moon in direct sunlight is completely blown out. Figure 2 exposure was 1/15 second at f/8.0 and ISO 6400.
There are many ways to photograph a total lunar eclipse, and the equipment needed to photograph one varies widely – from point-and-shoot cameras to sophisticated astrophotography rigs. I will keep this discussion limited to what an intermediate/advanced photographer might own. For the shots in this article, I used a full-frame-sensor camera with a 400mm f/5.6 telephoto lens. I added a 1.4X tele-converter lens that increases the lens focal length to 560mm, but decreases the maximum aperture by 1 f-stop (i.e., from f/5.6 to f/8.0). A sturdy tripod and remote shutter release are important because the slightest vibration will blur the details of the Moon. And, on this January 20th night, it was quite cold and windy. So, a sturdy tripod was a must. However, some digital cameras these days have outstanding image stabilization that will allow you to hand-hold the camera at low shutter speeds (i.e., 1/15 second) with very good results. I used a camera with a full-frame sensor because at ISO 6400, very high noise levels can be managed by using noise-elimination software such as Topaz DeNoise 6. If you use a lower ISO value, where noise is less of a concern, then you would need to use a slower shutter speed. At shutter speeds longer than 0.5 seconds, however, movement of the Moon as it travels across the sky is noticeable and can blur the details. You could use a super-telephoto lens with a faster aperture such as f/2.8 that will allow you to use a lower ISO value, but such lenses are very expensive. Another option is to use a battery-powered, equatorial mount (also called a star tracker) to keep the traveling Moon stationary in the camera frame, but, such specialized pieces of equipment are getting into the field of astrophotography.
When the Moon reaches its totality phase, it will appear an orangish red color. A total lunar eclipse happens when the Moon travels through the Earth’s umbra, and the Earth blocks direct sunlight from hitting the Moon’s surface. Some sunlight will reach the Moon’s surface through the Earth’s atmosphere, bathing the Moon in a reddish glow. In the shot below, the lunar totality had just begun. For the shot below and the first image above, I used an exposure of 0.3 second at f/8.0 and ISO 6400. All images were cropped.
In summary, photographing a total lunar eclipse is a rewarding experience, but can sometimes be challenging. And, you don’t have to travel around the globe to photograph one. It’s just a matter of stepping out of your front door. The more you do it, the easier it gets. Most importantly, even if your photos don’t come out as expected, you will have seen an awe-inspiring, natural phenomenon with your own eyes!


