
This article is about achieving straight lines in architecture photos, despite the divergent or convergent lines and barrel shaped distortion produced by a wide or super wide angle lens.
Roughly speaking, the center of the lens shows the least distortion. Put the camera at roughly the center of the floor-to-ceiling height or ground level-to-roof height, as much as possible. This is 4 feet off the floor in a room with 8 foot ceilings. Outdoors, when taking a picture of a house, try photographing from a relatively high spot like the slope of a neighbor’s lawn.
Methods for leveling the camera, in order of sophistication (I’m talking about leveling the lens forward-back and assuming that you’re also already leveled the horizon left-right):
- When handholding your camera try to not slouch.
- Level your camera using a spirit level placed in the hot shoe if you have a DSRL camera. This only works if not using flash on the hot shoe. Great for landscapes.
- Put your camera on a tripod for more positioning control.
- Level your camera by tilting the camera to minimize convergent/divergent lines as seen through the viewfinder or live view. Use the sides of the view finder as a guide. If by eye and handheld, this kind of rough. If on tripod, this is not bad.
- Level your camera by lining up verticals in picture with guide lines on camera to minimize convergent/divergent lines. Guide lines (3X3 rule of thirds or 5×5) may be available on your view finder or maybe only on live-view. This works like a charm.
- Get a tilt-shift lens. (I haven’t tried it.)
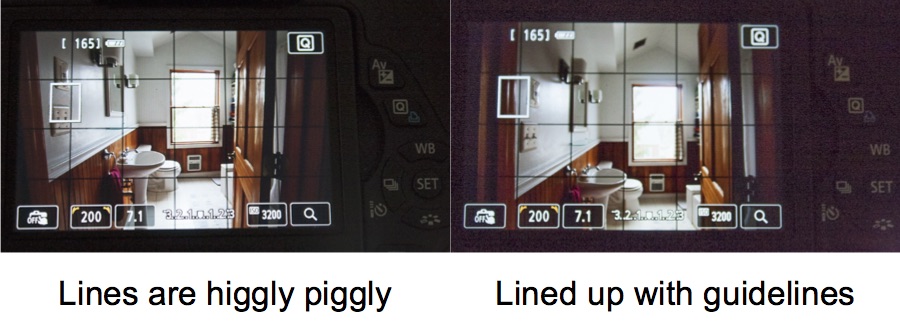
Using the guidelines available in Live View, we see that the vertical lines in the photo on the left are badly aligned, especially those in the foreground. After adjusting the tripod, the lines in the photo on the right are parallel to the guidelines.
In Lightroom v5.7, fix the last bit of correcting for convergent/divergent lines using Develop>Lens Corrections
- Enable Profile Corrections
- Remove Chromatic Aberrations
- Vertical (under basic tab)
or Vertical slider (under Manual tab) - The Profile Corrections corrects barrel-shaped distortion and, on my Sigma 10-20mm lens, vignetting. The better you correct for verticals in camera, the less the “Vertical” correction will force you to crop the resulting keystone-shaped image.
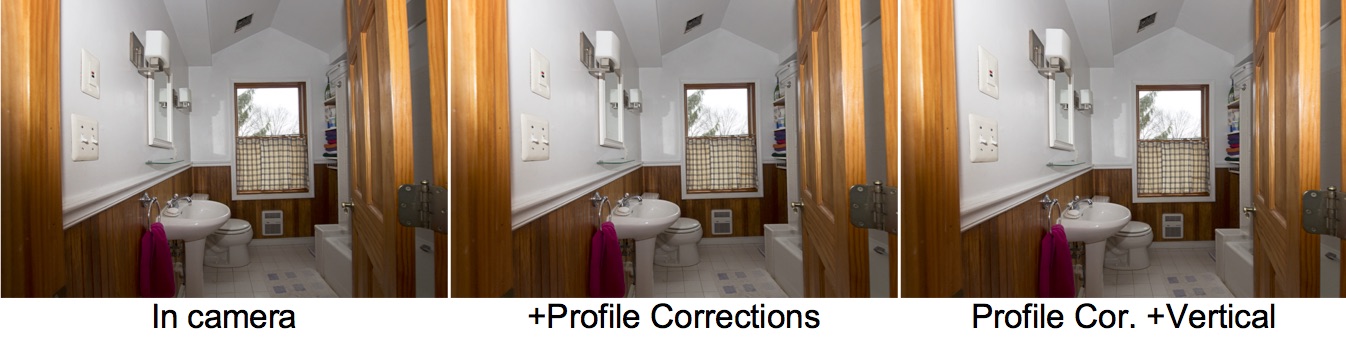
I made no effort to get my verticals straight and the camera level (left); it’s especially obvious with the door. The first lens correction (middle) uses the profile corrections for my Sigma 10-20mm lens to fix the barrel distortion and vignetting. The last one (right) is Lightroom’s best attempt to make the vertical lines vertical. Notice that the picture has been slightly cropped.
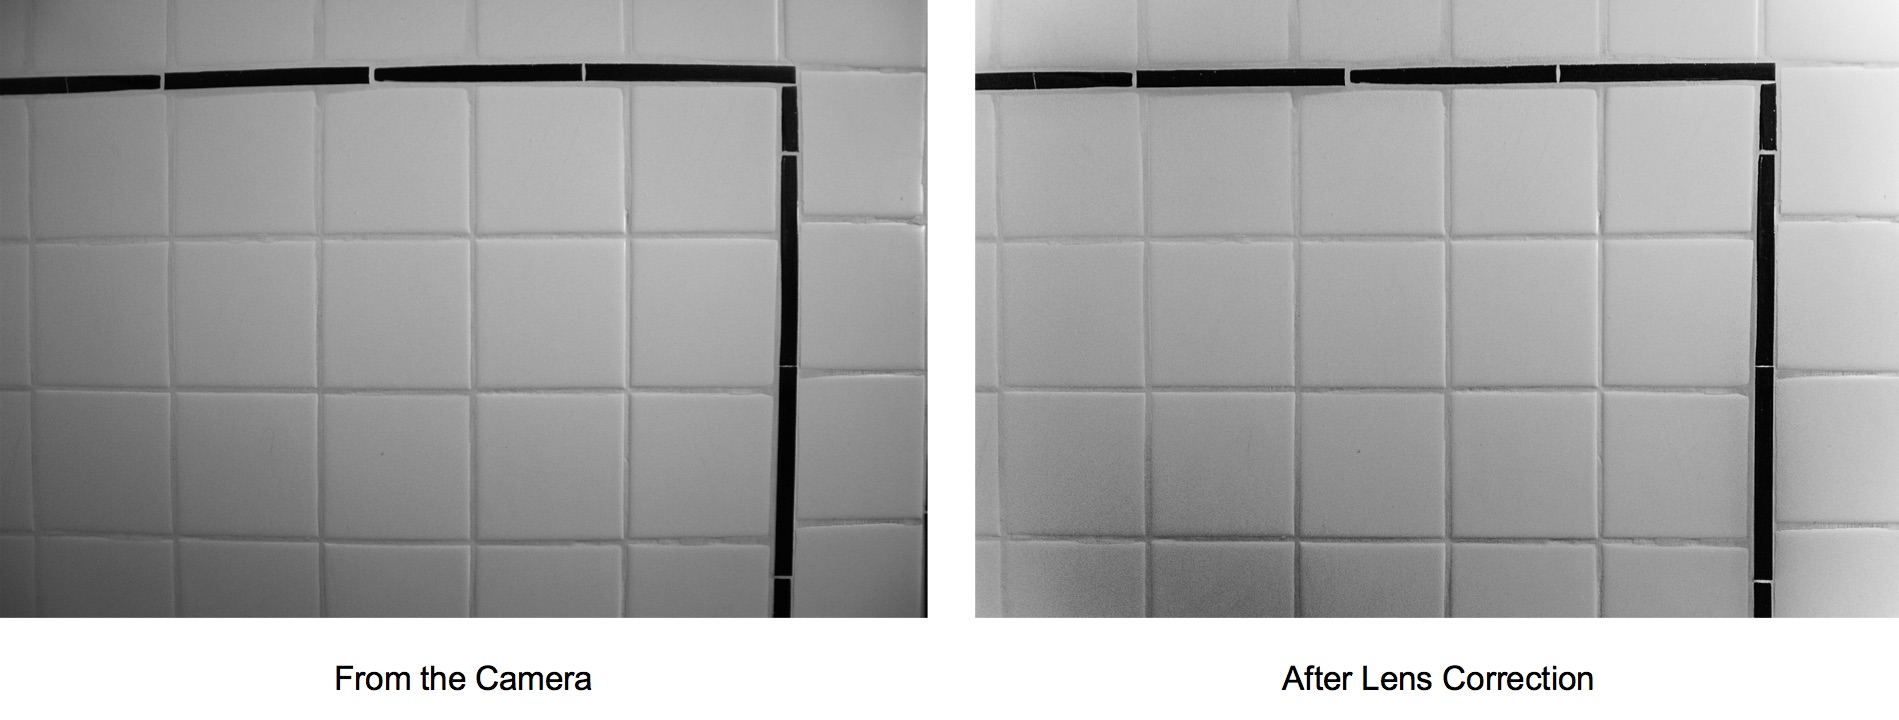
Barrel distortion on my SIgma 10-20 mm lens is subtle. With the photo on the right, maybe you can see the bulge in the center and the curve of the black tiles. Selecting profile (lens) correction in Lightroom produces the straighter result on the left. Vignetting is reduced as well.
Finally, if you get an image with too much front lawn, ceiling or floor for your tastes, you can crop as a final step. Better than composing the picture in such a way that forces crazy lines and then trying to do a big correction in Lightroom or Photoshop, which will also necessitate cropping. An alternative strategy is to select an interesting small item in the foreground to make the large expanse of foreground more tolerable. This is commonly done in landscapes.
Most people think of these considerations about making vertical lines with regards to exterior shots of buildings. Here I show a photo of the Bromo-Seltzer Tower in Baltimore, which is an extreme example because it is so tall. While talking the photo a block away keeps it from getting too distorted, the camera is at basement level, so I can’t do most of the in-camera strategies like leveling the camera or shooting at a height that is at the middle of the building. (The technique that would work is using a tilt-shift lens.) Instead I corrected the verticals in software. I’m not sure which one looks more “right;” the original is a true image but corrected verticals is usually the expectation in architectural photography.
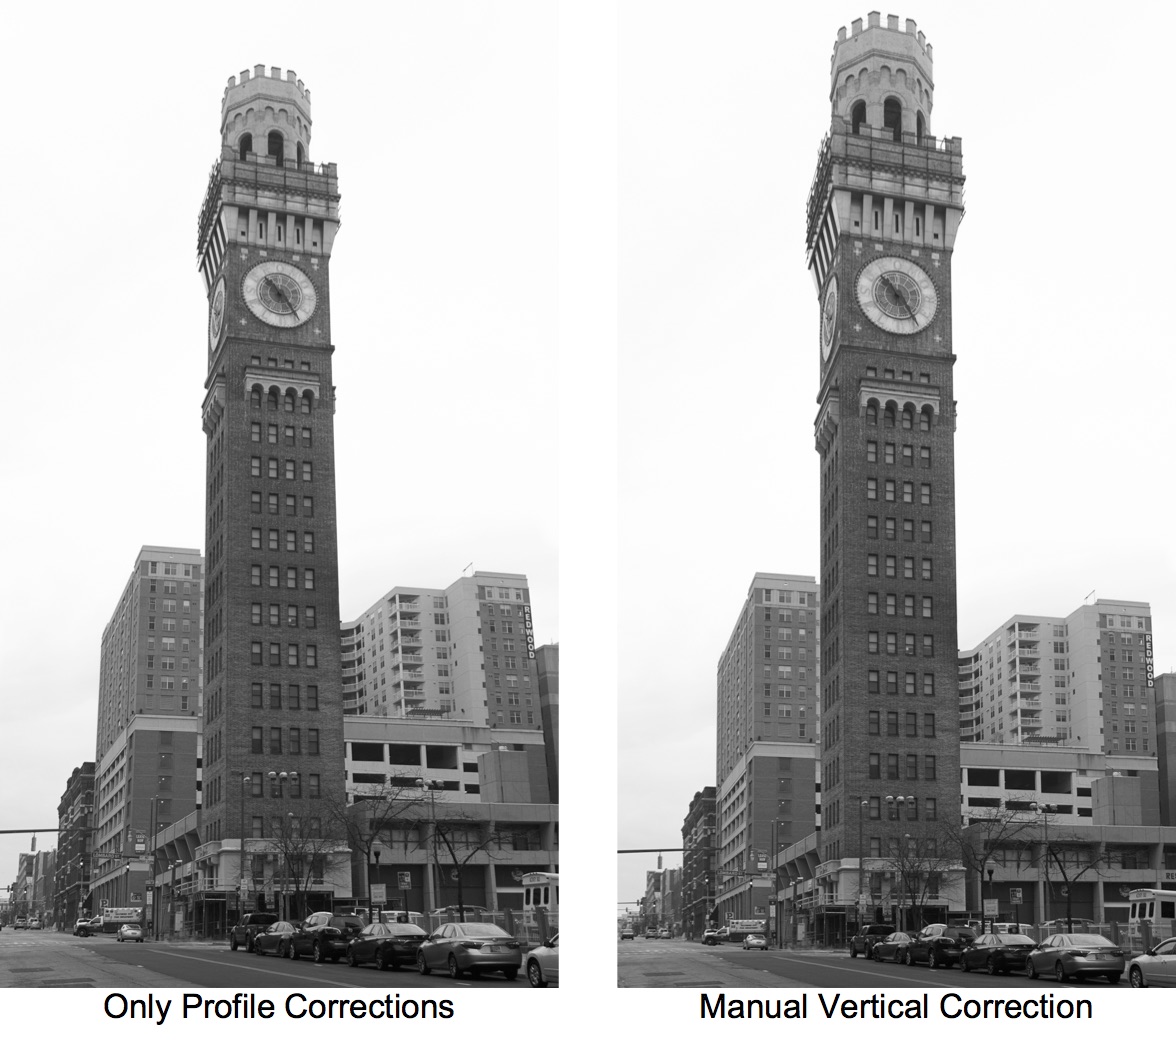
Photo of the Bromo-Seltzer Tower in Baltimore, before and after manually correcting the verticals. Lens profile corrections were applied to both.
So, to get vertical lines vertical: point the camera level at the subject, check the verticals with guidelines or at least the sides of the view finder, correct barrel distortion and vignetting with lens correction software and finally if necessary give verticals that last bit of upright with software.