Way back in December 2013 I wrote a Kernels of Koren article (http://www.ssccphotography.org/wp-content/uploads/2013/11/CR-Dec13.pdf about my return to film shooting because of my frustration seeing Instagram-style grunge filters applied to perfectly good pictures that were sharp and well exposed. Today we see many blog posts and articles in the photography media talking about other photographers that are going back to basics by picking up film cameras, sometimes for the first time. I was either ahead of the curve or impatient.
Since that article was published I have added two other film cameras I like to shoot with to my camera bag. The Kodak Signet 35 I originally wrote about has been retired due to a shutter that doesn’t always release when I push the button. The “newer” camera is a Kodak Retina 1a, manufactured between 1951 and 1954. The camera has a unique design by today’s standards because the lens folds in to the camera body when not in use. When in use the camera is connected to the lens with a bellows. It has no light meter and no rangefinder. You estimate the distance to the subject and set the focus dial. Exposure is calculated with a separate light meter app in the iPhone or I just use the Sunny 16 rule. Even though this is a Kodak camera, its manufacturing factory was in Stuttgart Germany and is equipped with a Schneider lens.
My second “new” camera is a Leica M5 with a 50mm lens. This camera was manufactured around 1971 but the lens dates to 1956. The M5 has the dubious distinction of being known as the ugliest Leica ever made. It’s larger than any previous M series Leica and had both lug straps on the same side of the camera so it hung vertically. However, it was the first rangefinder with TTL metering and the first with a spot meter. The 50mm f/2.0 lens is super sharp with no distortion or flare. I have no idea what the true story is, but I can imagine a 1956 lens got together with a 1971 camera after a ceremony in a tiny Las Vegas chapel. The results are worth it as the two function together flawlessly and produce excellent pictures.
Now that I’m shooting all this film I must get it processed. I decided to only shoot black and white and process it myself to save some money and to retain control of the photographic process. That was the easy part, the hard part was getting the negatives converted to a digital file for printing and archiving. I tried scanning the negatives but that takes too long. A high resolution scan is twelve excruciating long minutes per picture. Including loading the negative holders in the scanner, that’s over eight hours to scan all 36 images on a roll of film. Scanning one roll of film should not take longer than watching a baseball doubleheader. Looking on the web for a solution I was led to read a chapter of The Dam Book by Peter Krogh that discusses a simple solution. Use a DSLR with a close up lens to take pictures of the negatives. The scan time is 1/40 of a second so the whole roll is done in about 10 minutes.
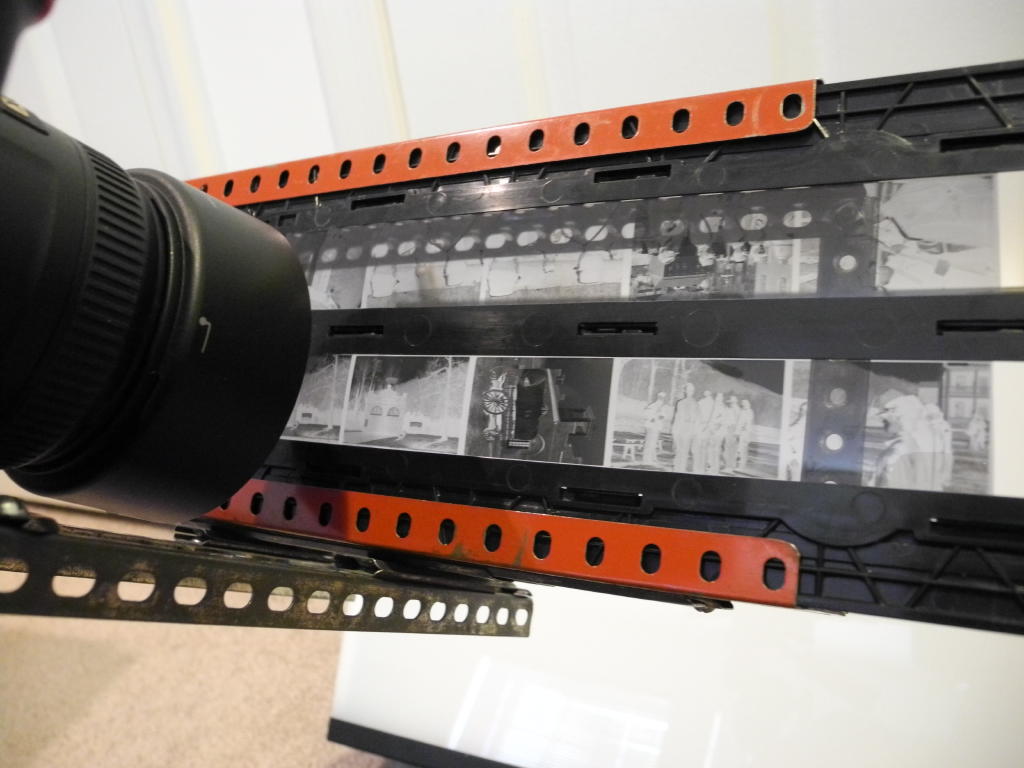
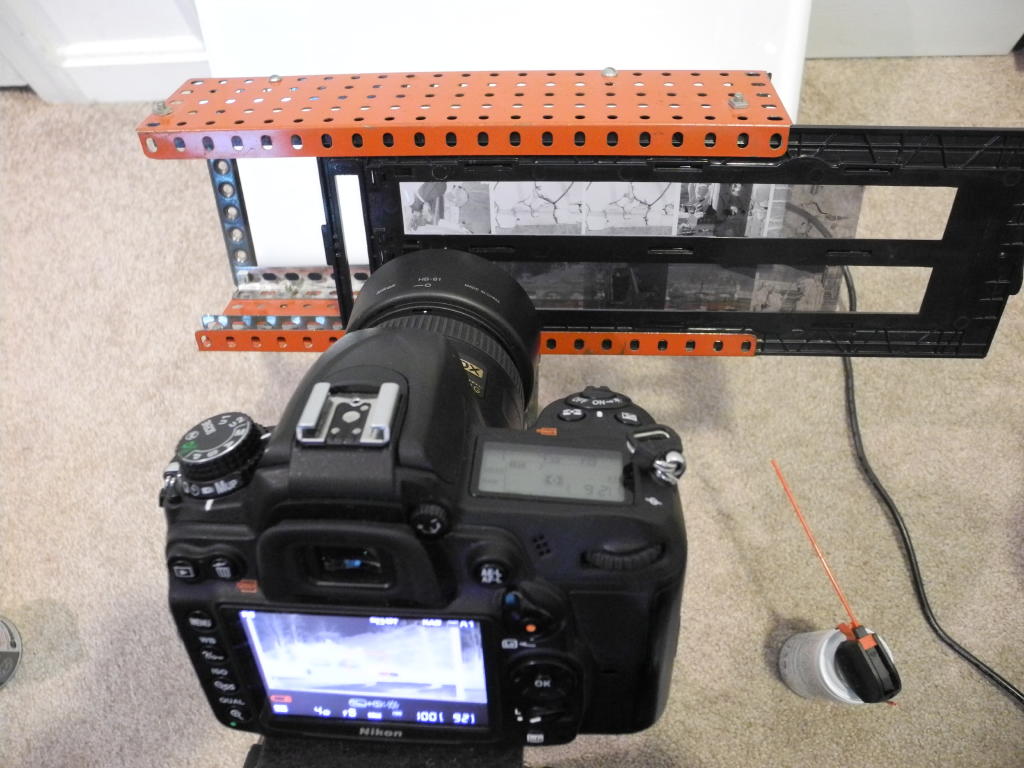
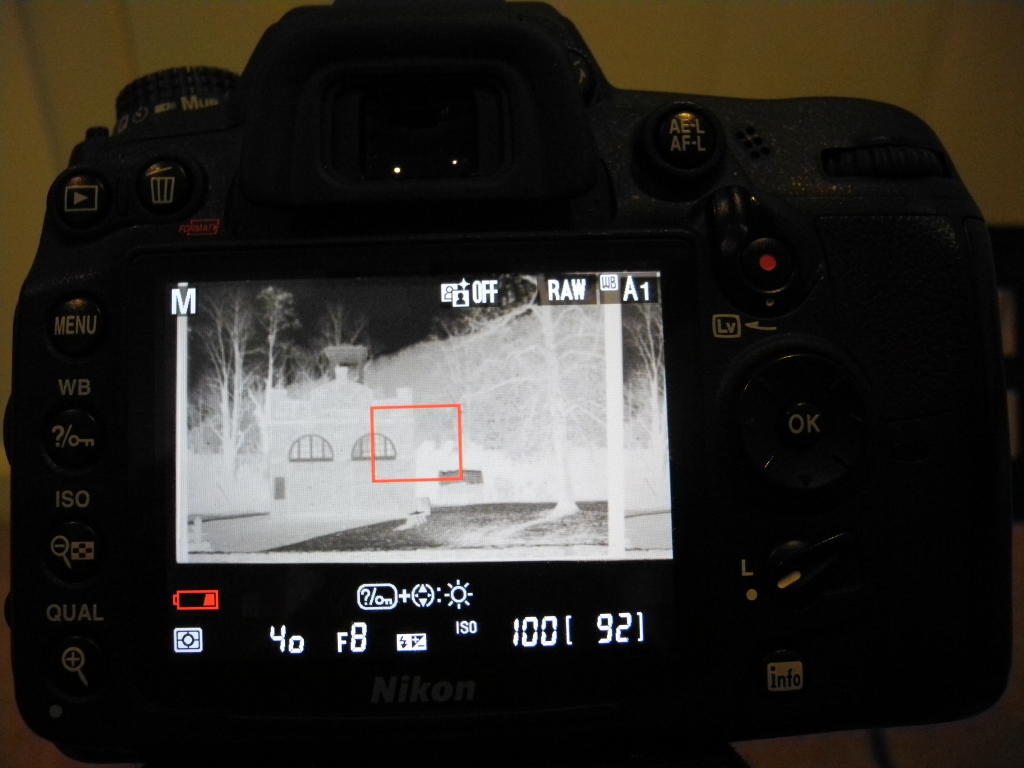
 After a bit of experimenting I finally settled on a routine that works for me. I built a contraption from an old Erector set that I used to play with 40+ years ago. It seemed fitting since I’m using cameras that are as old or older. The contraption is designed to hold in place the scanners negative holder, that holds two strips of film, but allow it to slide to the next image in the roll after the exposure. When the row is finished I flip the holder over to scan the next row. Each row is long enough to hold a six image negative strip. When both strips are shot I load two more negative strips and continue shooting. The contraption is mounted so the center of the negative is aligned to the center of the lens. The whole thing, contraption, negative holder, camera and 40mm micro lens is mounted on a tripod. I use a daylight balanced (5000K) fluorescent lightbox as my light source. Taking the picture is as easy as turning on Live View, magnifying the view on the back of the camera to focus manually on the film grain, dust-off the negative, then release the shutter with an IR remote. Slide the holder to the next image and repeat.
 Exposure is manual since the light source does not change, white balance is manually set before shooting and I shoot everything in RAW for a little exposure latitude. I shoot at 1/40th of a second at f/8. According to lens test websites f/8 is the best aperture to use with this lens to achieve the highest resolving power. I also get the bonus of a little depth of field in case the negative has a slight curl to it. The slower shutter speed also eliminates flicker commonly seen with fluorescent lights. The tripod and IR remote makes sure I don’t need to touch the camera during the shot. I also wait at least 10 seconds after last touching the camera or using the canned air to let everything settle before releasing the shutter, and I use mirror lockup to make sure there is absolutely no vibration in the camera to cause a blurry image.
 Naturally the image in the camera is inverted since it’s a negative. I invert back to normal in ACR, crop and remove any stray dust before saving as a DNG. Each file is about 17MB.
With the number of people going back to film or trying it for the first time I imagine there is a growing need to quickly digitize images for printing, posting online, and of course cataloging for the future. Unfortunately, I don’t see for sale easy to use negative copy devices that work as well as my contraption. My setup fits my needs, I’m still either ahead of the curve or impatient.
As I said earlier in December 2013, I have no interest in printing negatives in a darkroom. I find pleasure in using a manual camera and employing the alchemy of chemicals to conjure a latent image from a piece of plastic backed silver. My negative scanning contraption allows me to enjoy the images faster at higher quality and much more conveniently than traditional flatbed scanning.
